SceneFromGIS : Get and Prepare Data
Create alternative layers by attributes
Random points in vector polygon
Drape (vector line and points)
Additional example using OSM and OpenDEM data
Cut heightmap and create vector layers
Another example using IGN data
In this tutorial, we will see where we can get the required data to generate maps using SceneFromGIS.
We will need two types of data.
First, a digital elevation model, also known as a heightmap, which represent the altitude of the terrain as a raster map. Those data are generally composed of multiple tiff files (tiles).
Second, topological layers, geospatial vector data which represent the different objects we want to place in our maps. Topological layers can represent paths / roads, buildings / walls, water surface / rivers or forest surface / hedge / tree. Those data are generally composed of multiple Shapefile files (shp with their linked cpg, dbf, prj, qmd and shx files).
Requirements | Usage | Link |
QGIS | Data preparation |
GIS | |
CRS | |
Vector and raster |
In this tutorial we will use the example of data coming from IGN (Institut national de l'information géographique et forestière) but you can manage to use data from almost any source, depending on the location you are interested in.
It's important to note that SceneFromGIS was developed using IGN data as source for tests, meaning that the software is build to work fine with these data sources. Anyway, you will find a way if you want to use other data source.
IGN : https://ign.fr/
Raster heightmap | |
Vector layers |
https://centrodedescargas.cnig.es/CentroDescargas/index.jsp
For vector layers, OpenStreetMap (OSM) is a good source of data.
OSM is a free, open geographic database updated and maintained by a community of volunteers via open collaboration.
Pre-made Shapefile downloads and services generating custom Shapefile downloads exists. bbbike.org is definitely a good starting point.
For more information, check the OSM wiki : https://wiki.openstreetmap.org/wiki/Shapefiles#Obtaining_shapefiles_from_OSM_data
For digital elevation model, you can use OpenDEM, but the resolution is not very high compared to state organization data previously cited. As far as we know, there is no better open source alternative at this time. For more information : https://opendem.info/
Raster heightmap | |
Vector layers |
First, we need to select the center of the area we want to create a map from.
You can use Google Maps and right-click a point to get its exact location.
For example, the position 48.853159462022425, 2.349497366835291 correspond to Notre-Dame de Paris.
You can use QGIS pluging “Lat Lon Tools” to view the exact position in QGIS user interface.
For this tutorial, we will focus on the area centered on 48.36473101843543, 7.429202290222781 which is located at Itterswiller, a commune in the Bas-Rhin department in Alsace in north-eastern France.
Create a new project in QGIS, and set the projection system (CRS). The projection system you choose should approximate the 1 m level, meaning that a difference of 1 in the projection system, should correspond to a 1 m distance in the real world.
To change the CRS, there is a button located bottom right, looking like this :
For example, the projected coordinate system for France is EPSG:2154 also named RFG93 or Lambert-93.
Each country / area has a different projection system to approximate the meter, in fact, as the earth is not flat, we need to pick the good projection system linked to the area.
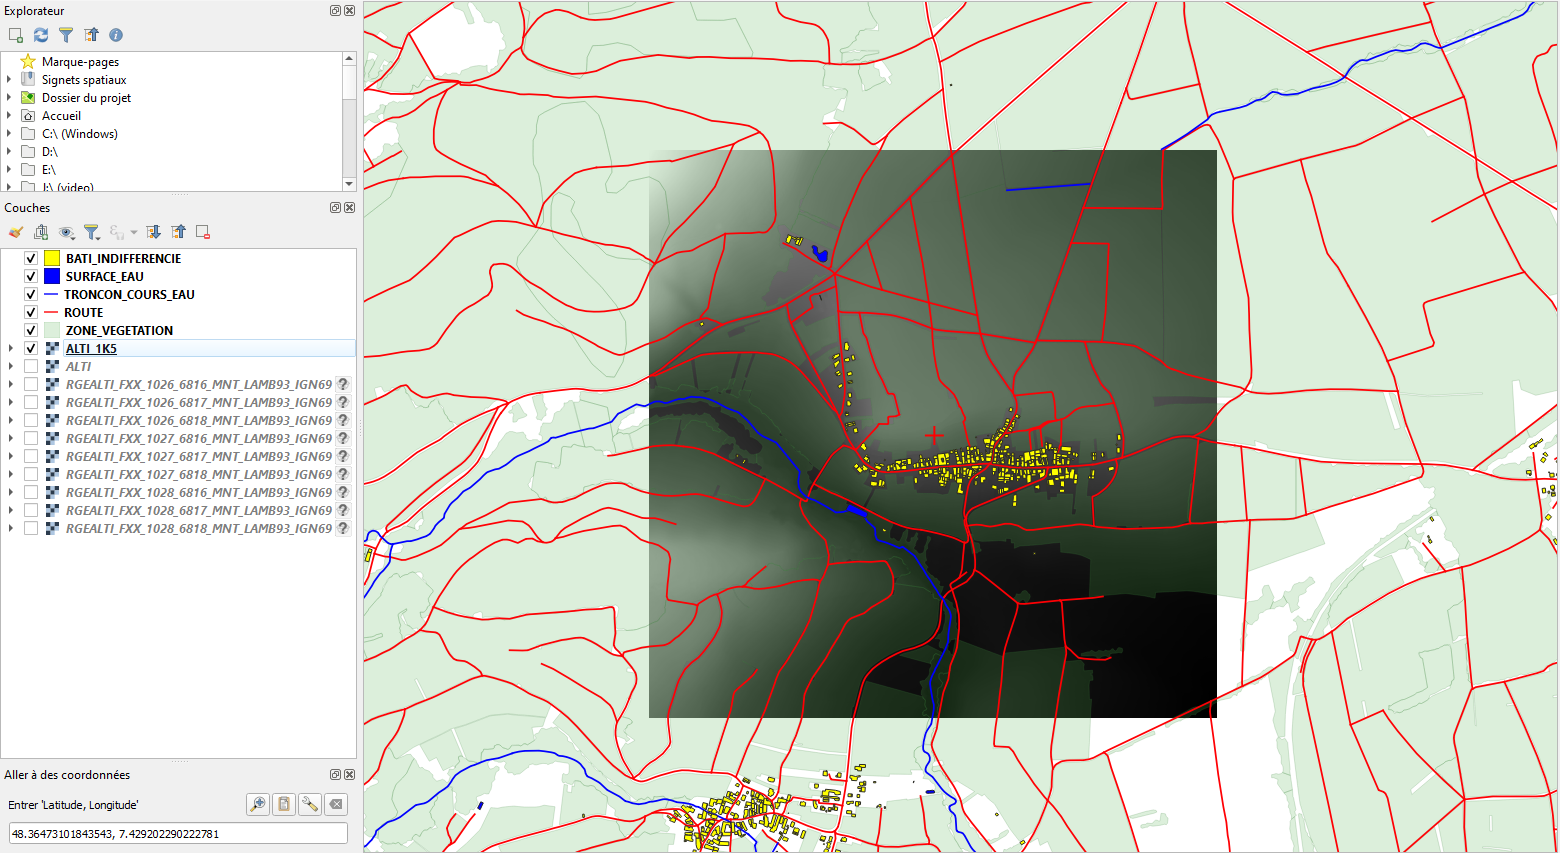
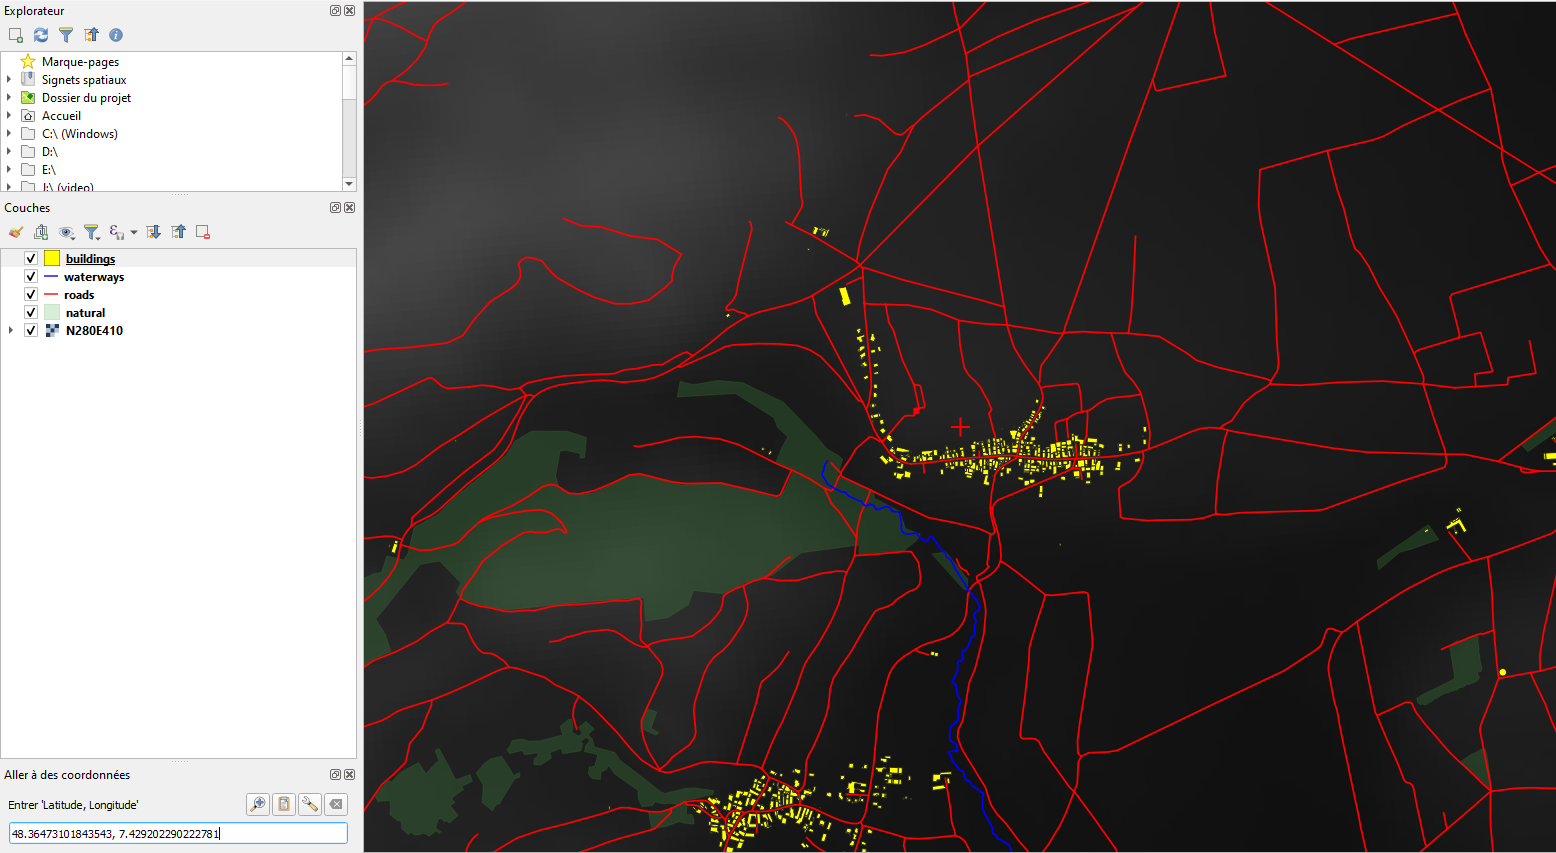
To import data, you can drag and drop your Shapefile and heightmap into the layers area located in the lower left.
If everything goes as planned, you should have something like this.
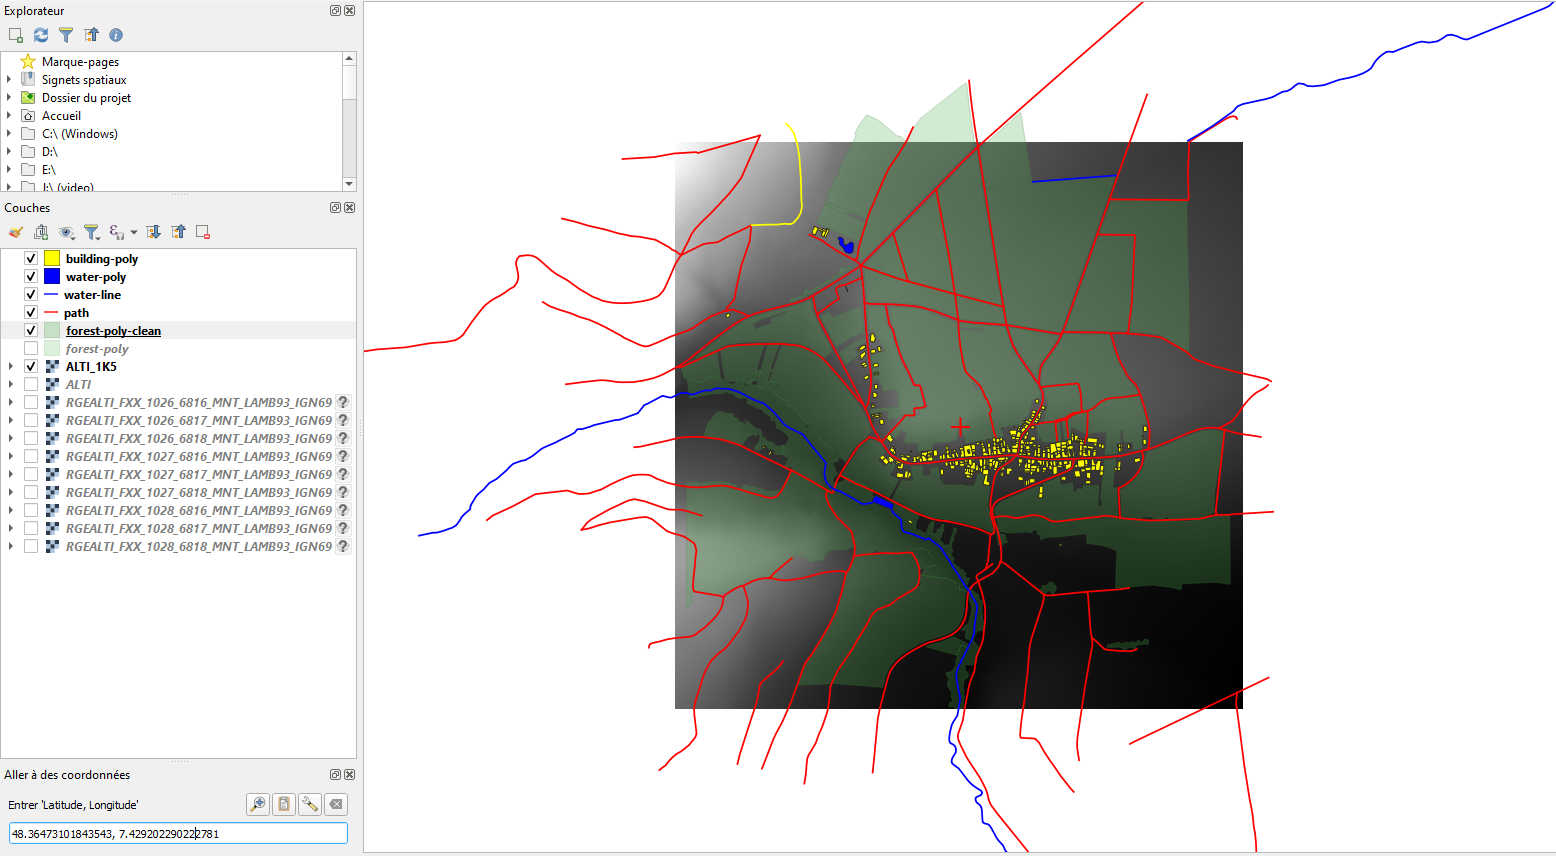
Example of a data importation using QGIS red : path yellow polygon : building blue polygon : water blue line : water path green polygon : forest (alpha 20%) |
If you have a heightmap as tiles, you can merge them using Raster > Misc > Fusion.
Select all the tiles and fuse them.
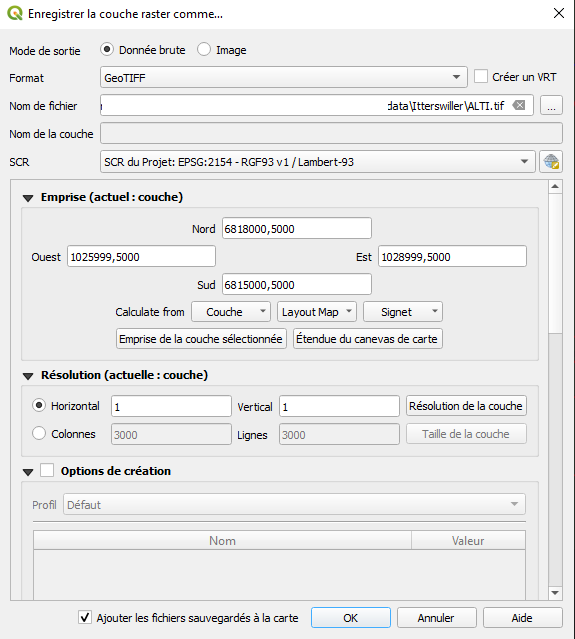
You can then export the result, don’t forget to force the CRS (SCR on the screenshot)
You should always check that the projection of the file you export is the right one.
For raster, you can force a new projection using Raster > Projections > Assign Projection.
You can also export the layer and choose the projection in the CRS menu.
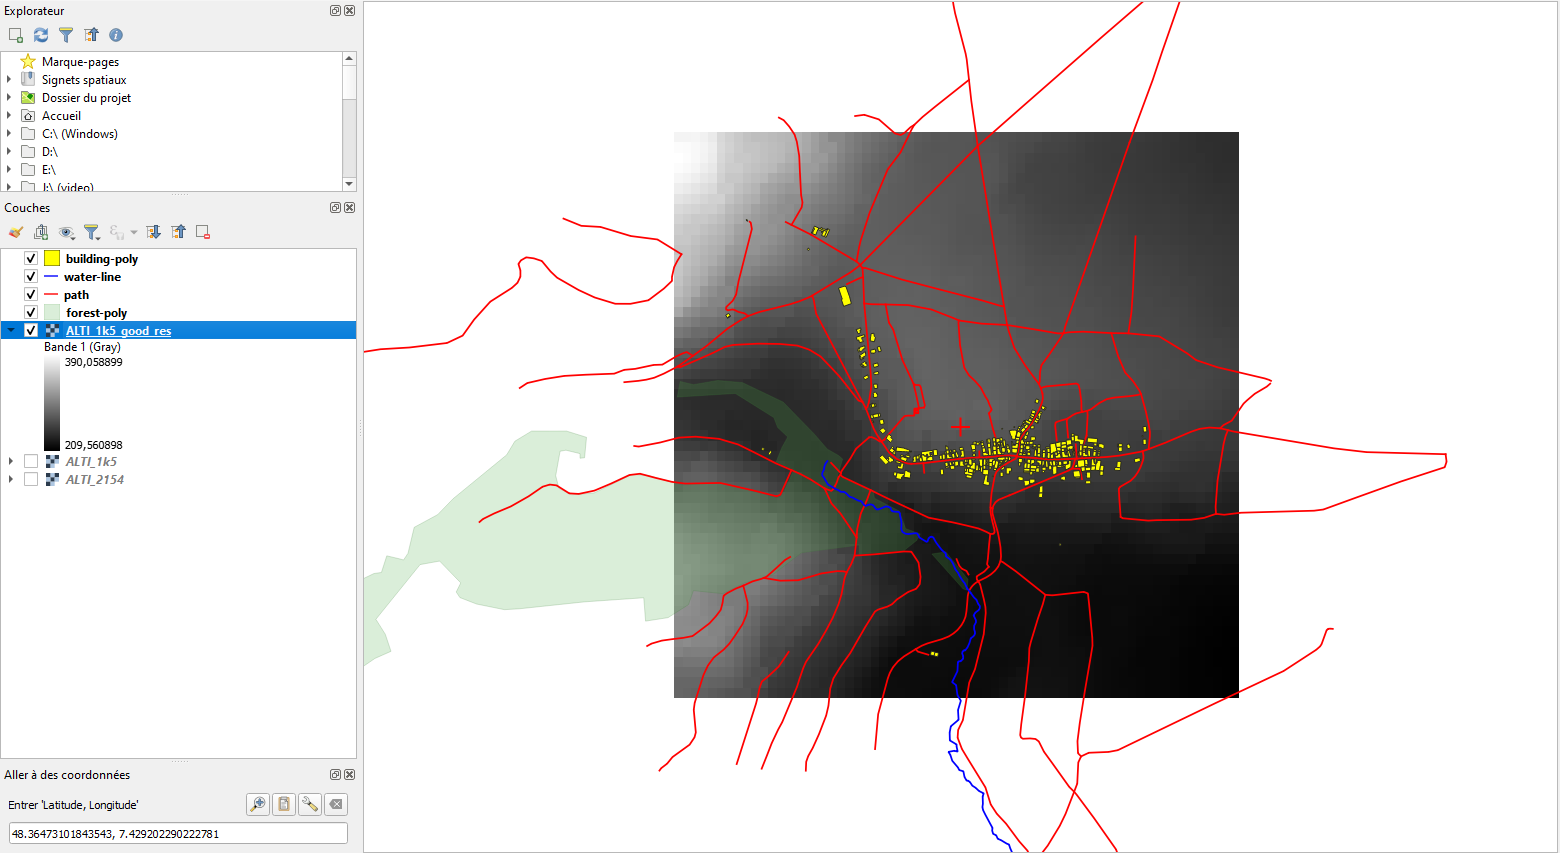
If you don’t have a 1 m resolution, you will need to alter it, as SceneFromGIS won’t make it for you. The easiest way to do it is to export the layer you want and to force the resolution in the menu.
It is very likely that the area of the heightmap you have doesn’t match the area you wanna use as a map. As SceneFromGIS use the heightmap as background, this is the area which will be considered as “the map”.
To cut a part in your heightmap, you can use Raster > Extraction > Clip Raster by Extent.
You can then choose your heightmap as a source and compute its extent.
In our example, the extent of the layer is the following :
1025999.5000,1028999.5000,6815000.5000,6818000.5000 [EPSG:2154]
As I want a 1500 m × 1500 m area, for example, I have to cut it.
Here is my exact steps :
Example of a raster fusion then cut using QGIS |
Your vector layers are probably not exactly extended as your heightmap.
We will create new layers from the ones you have imported.
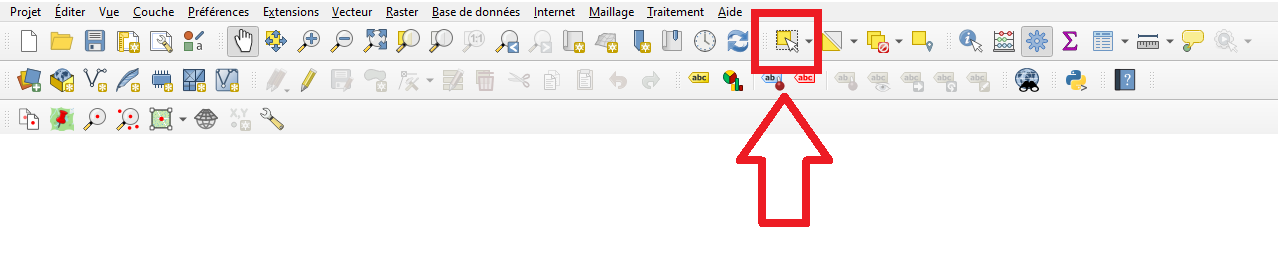
First, select the layer you want to process in the layers list.
Second, select the entity selector tool in the toolbar.
Now drag a square around your heightmap to select all entities which are inside the heightmap.
Now use edit > copy entities, to copy the selected entities.
Then select edit > paste as new vector layer, and save them in a new Shapefile.
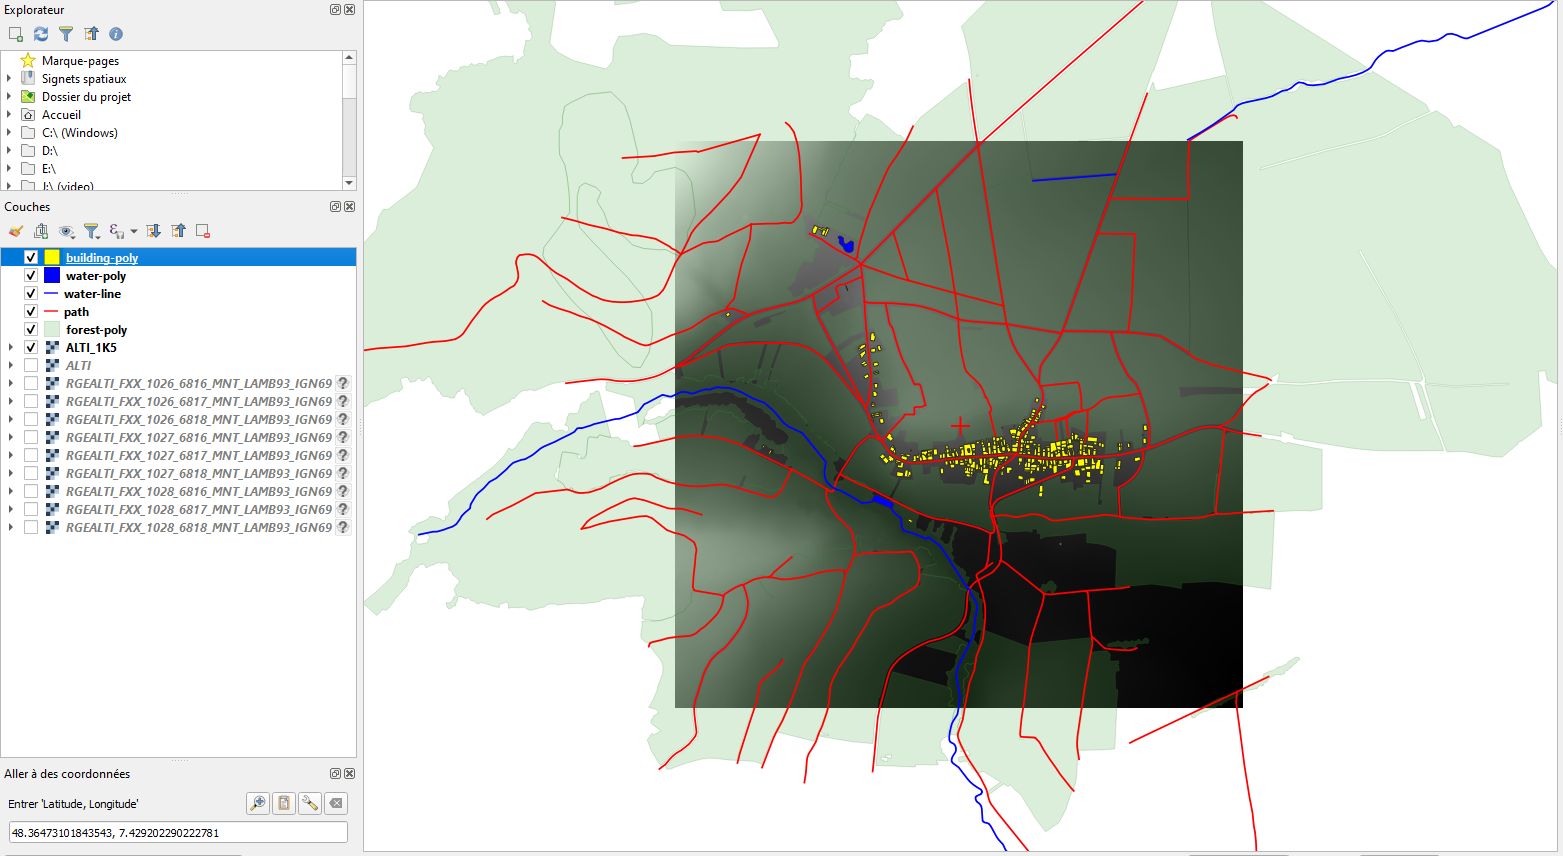
SceneFromGIS can guess the type of layers you want to import using their name.
The followings names are the best to use if you want to save time :
SceneFromGIS expected file names | |
Layer type | Layer name |
Heightmap | *.tif |
Roads (line) | path |
Builds (polygon) | building-poly |
Builds (line) | building-line |
Vegetation (polygon) | forest-poly |
Vegetation (line) | forest-line |
Vegetation (point) | forest-point |
Water (polygon) | water-poly |
Water (line) | water-line |
You can then delete the unused vector layers.
You should now have a view looking like this.
Example of a vector layer cut using QGIS |
Some layers may be still larger than the area, which is not a big deal, but this may create two problems.
First, it will slow down the further generation process.
Second, if an element (e.g. polygon) has a part out of the bounds, it will not be included in the generation process, which means a lot of lost time and lost data.
As an example, the original forest layer takes 30s to be generated but after this process, less than 2s for a good result.
To edit the current layer, activate the edition mode :
You can now select unwanted layers and delete them.
You can also use the vertex's editor to reduce polygon size.
Furthermore, you can now select unwanted vertices and delete them.
This could be a very tricky moment, as you don’t want to create holes or other aberrations in the layer, as SceneFromGIS will not accept them.
A good idea is to advance step by step and to save intermediate results. If anything goes wrong, you can go back to a safe setup.
Example of a forest layer cleanup |
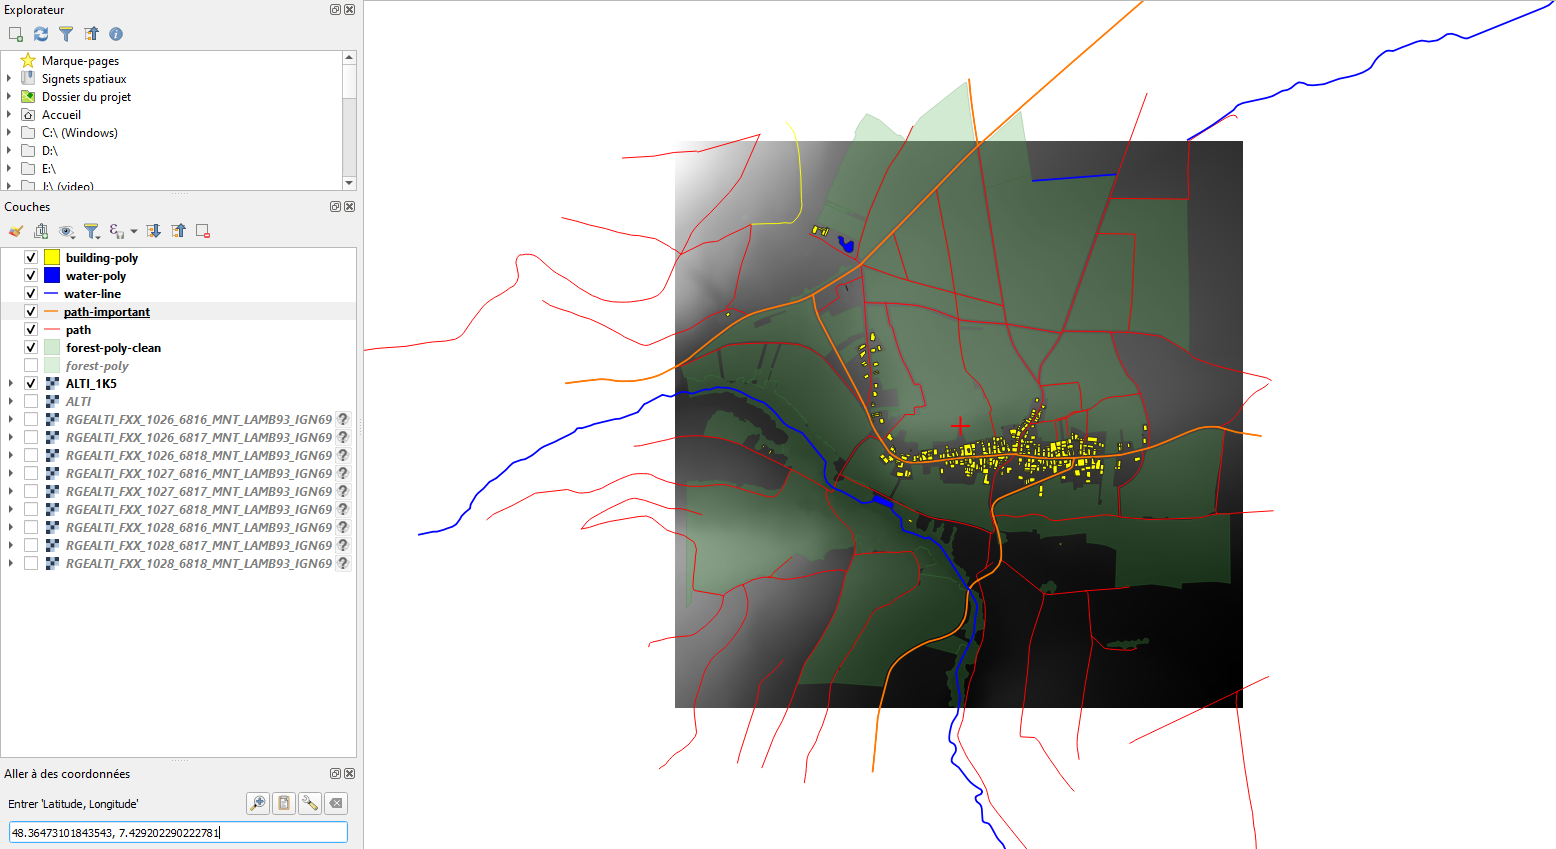
An idea could be to create new layers from the existing ones, using attributes tables information. For example, we can create a new path vector layer from the original path layer selecting only the most important ones, checking the attribute maps.
We will not expand on this, as this is linked to the data source you will use, but this is definitely a good trick to create multiple layers from a single one to have better final results.
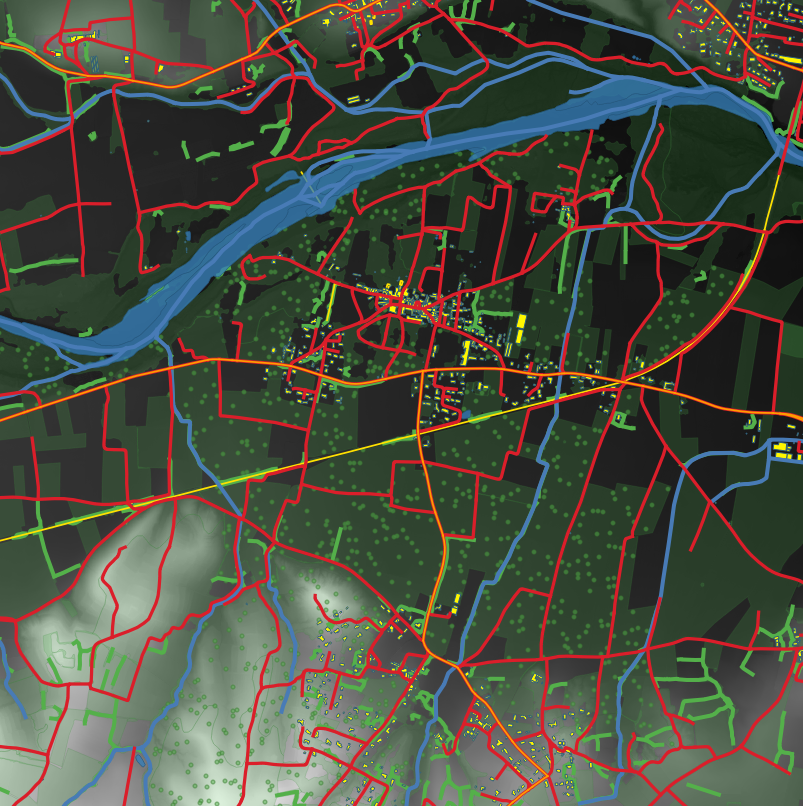
Example of a “major path” layer creation using attribute table red : path orange : important path yellow polygon : building blue polygon : water blue line : water path green polygon : forest |
You can transform a polygon vector layer into a point vector layer using Vector > Search > Random point in polygons.
This could be useful if you want to place trees more precisely during the preparation step.
If there is no Z information for vector coordinate, a default 0 value for Z will be set by SceneFromGIS. Some 3D features will not work properly without Z information or with original data (which may not be equal to heightmap).
You can use the Drape function from the toolbox to put the Z value from the heightmap to any vector layer.
Example of a complete data preparation using QGIS red : path orange : path (important) yellow polygon : building yellow line : wall blue polygon : water blue line : water path green polygon : forest green line : hedge green point : tree |
Your polygon (the ones not showing) are probably partially out of the heightmap, cut them.
Coasts area can be tricky to handle, if you get problems, you should try to clip the Z value of heightmap between [1, 10000].
I don't really know why there is this bug yet, but this seems to fix the problems.
SceneFromGIS 2023
All Rights Reserved