SceneFromGIS : Convert data using SceneFromGIS
In this tutorial, we will see how to use SceneFromGIS to generate maps from the GIS data sources.
Warning : This documentation is linked to a specific version of SceneFromGIS, updates of the software will probably change things.
To start the program, use the provided binary file : SceneFromGIS.exe
The program can take several seconds to start, as it has to unpack all modules.
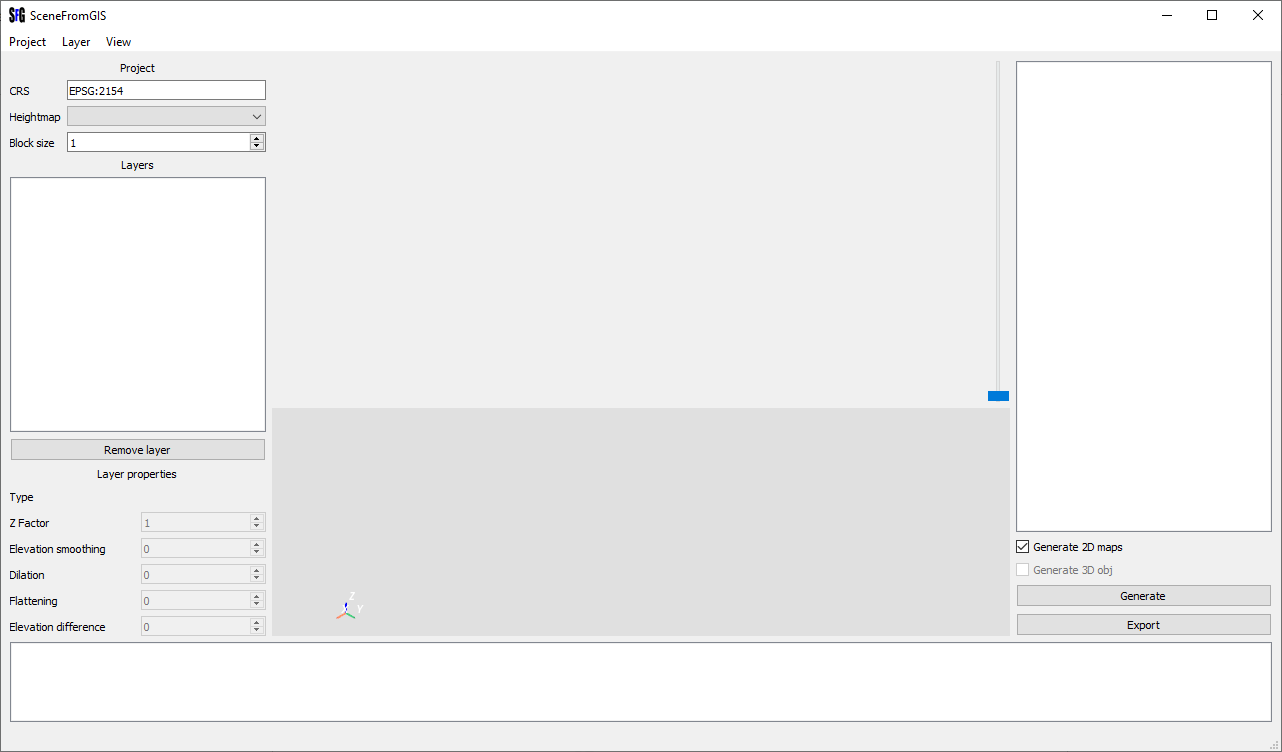
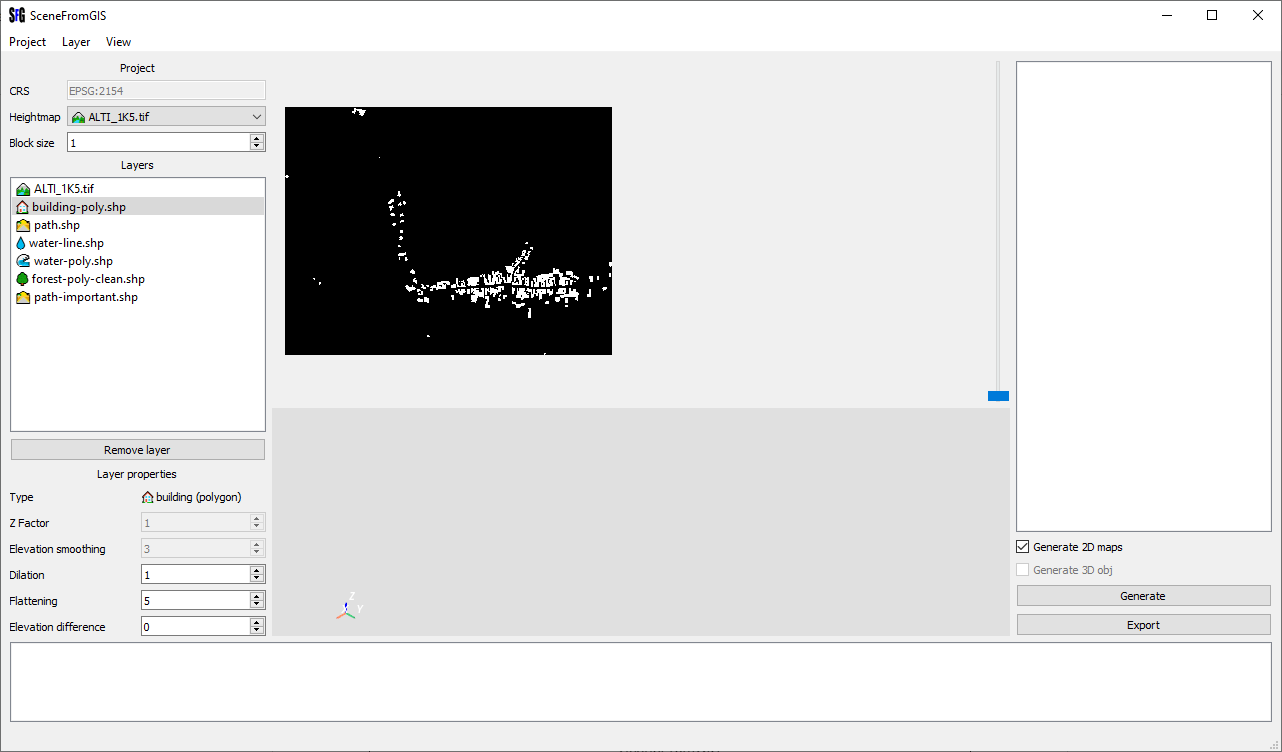
When the program is started, it should look like this.
SceneFromGIS : GUI |
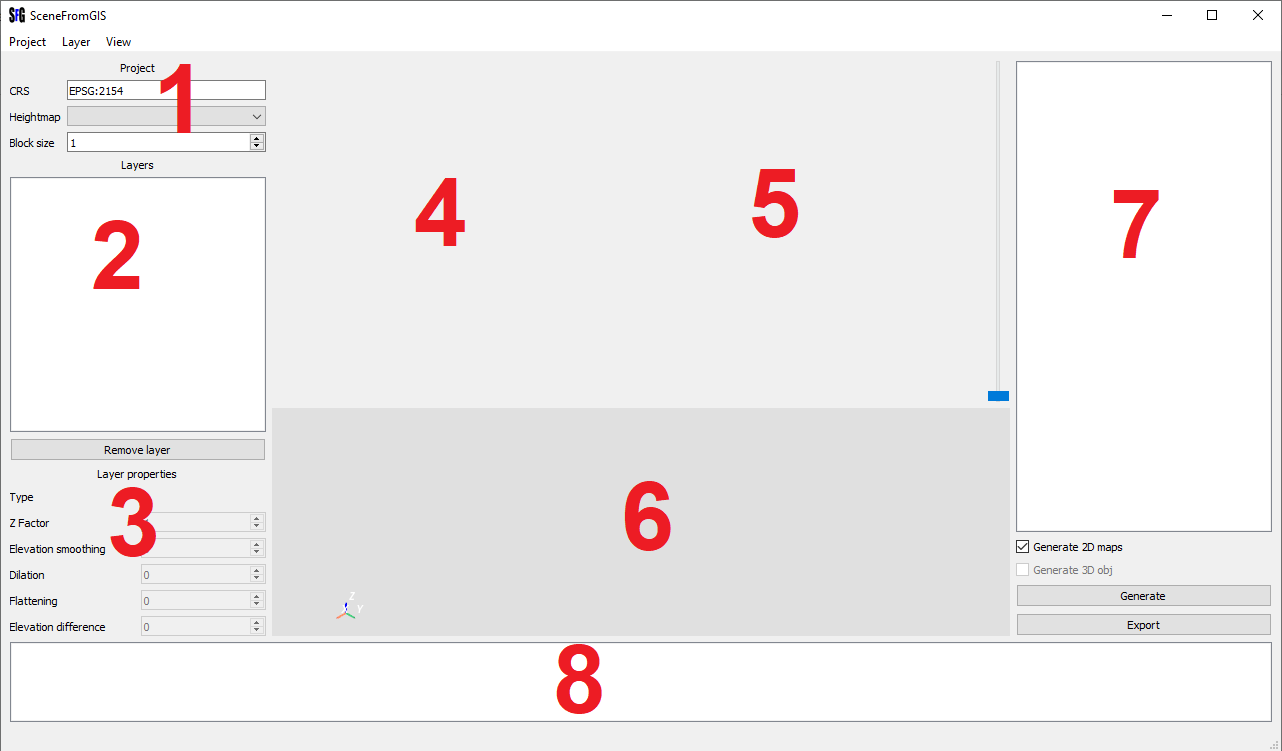
SceneFromGIS : layout |
Layout area 1 : change the CRS to the system you want to use and the block size to the size you want for your output.
Default CRS is EPSG:2154 and block size is 1.
Block size correspond to the multiple of the size map. (e.g., with block size = 256, if the output area is 500×500, the created area will be 512×512)
You can import layers 3 different ways.
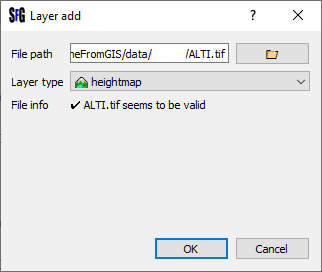
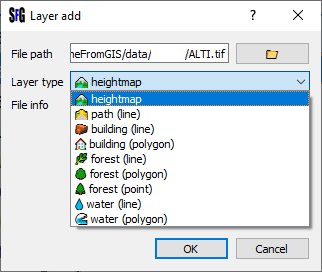
When you import a new layer, the “Layer add” window will pop up. To add a layer, select the layer type and click “Ok”. If you used good names, SceneFromGIS will predict the layer type you are using.
Layer add : window |
Layer add : Layer type |
After you imported the layer, it should appear in the layout area 2.
For your project to be valid, you must have a heightmap.
Layout area 1 : select the heightmap in the list.
You can configure your layers in the layout area 3.
The two first options are reserved for heightmaps.
Z Factor : value that multiply the Z value. Input values are probably 32 bits float number, output values are 16 bits integer values. 10 is probably a good value to start with. Z Factor is linked to a single heightmap but shared with all the other layers during generation.
Elevation smoothing : Final path smoothing of the heightmap. The smoothing is applied by a mean convolution mask. The value correspond to the kernel disk radius.
The three next options are reserved for vector layers.
Dilation : Dilate the layer map. The value correspond to the structural element disk radius.
Flattening : Auto median filter the layer map. The value correspond to the structural element disk radius.
Elevation difference : Apply a difference to the heightmap where the layer map is non zero. The value correspond to the difference to apply.
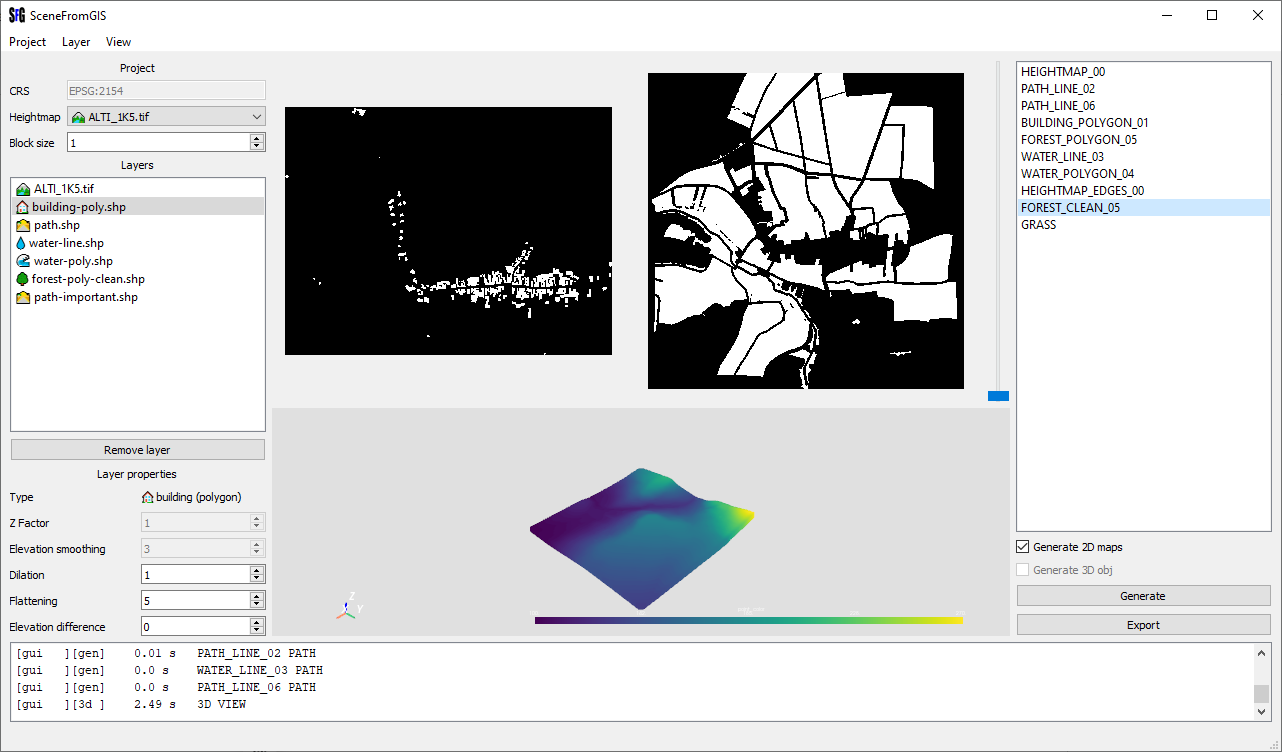
Example of a project |
To create a new project, open an existing or save a project, use the “Project” menu in the menubar.
The project file is just a JSON file with absolute path written. This mean that if you move your layers files or anything else, the project will not work anymore.
If you want to share your project, you will need to share your heightmap and layers too.
To generate the project, use the “Generate” button.
During the generation process, the user interface will freeze. This is normal, just wait for the generation to finish. This process will takes time depending on inputs layers complexity, area size and post process configurations.
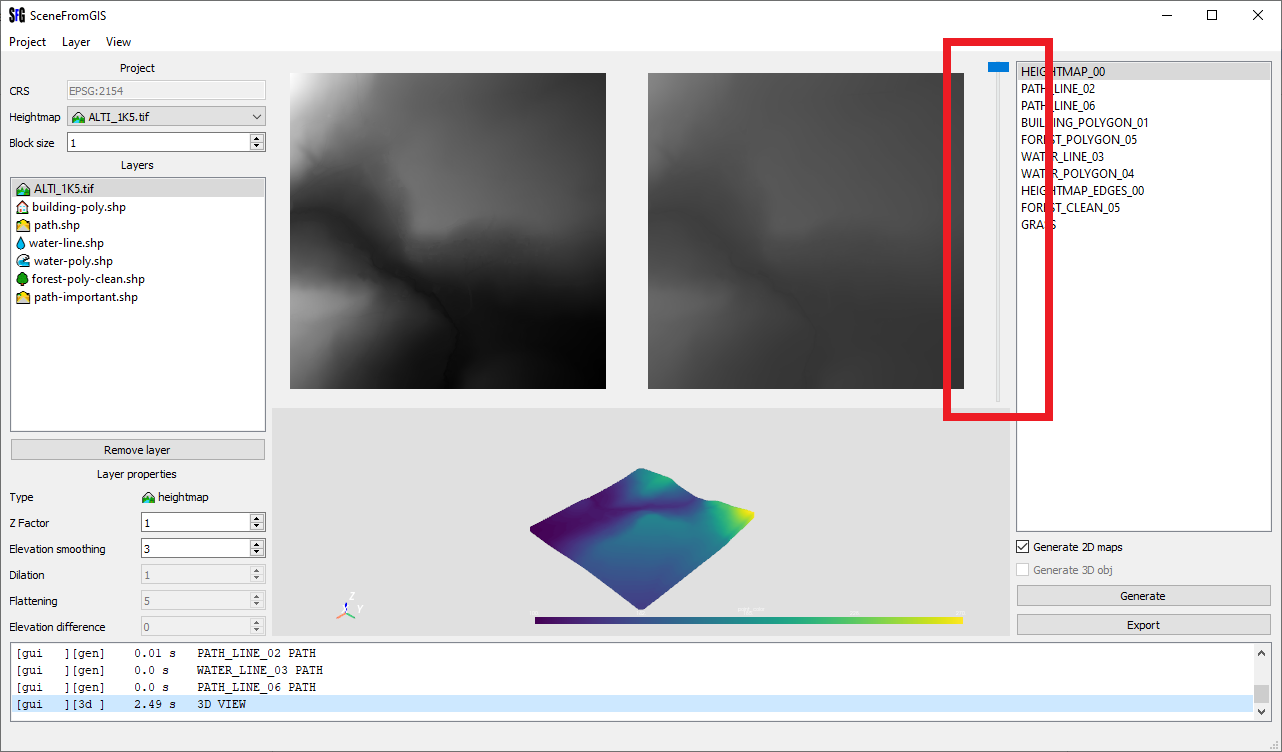
To export the generated project, use the “Export” button and select an output folder. The export process will export everything listed in the layout area 7, it will not regenerate anything. The export process will rewrite on existing files without warning.
Result of a generation |
Input images are normalized before view. This is not the case with the outputs. If you want to enhance the view, you can use the exposure slider. This slider does not affect data, only the view.
Change the exposure of the output view |
SceneFromGIS.exe elevation_map.tif output_folder [optional layers]
SceneFromGIS.exe
data/X/ALTI_CLIP_1k5.tif
output/X
--path-line data/X/path-line.shp *dilation 3
--path-line data/X/path-line-important.shp *dilation 5 *flattening 2
--building-line data/X/building-line.shp *dilation 2 *flattening 3
--building-polygon data/X/building-polygon.shp *flattening 3
--forest-line data/X/forest-line.shp
--forest-polygon data/X/forest-polygon.shp
--forest-point data/X/forest-point.shp
--water-line data/X/water-line.shp *dilation 5 *flattening 2 *elevation-difference -5
--water-polygon data/X/water-polygon.shp *dilation 2 *flattening 3 *elevation-difference -5
usage: elevation
output
[--block-size BLOCK_SIZE]
[--crs CRS]
[--z-factor Z_FACTOR]
[--elevation-smoothing ELEVATION_SMOOTHING]
[--path-line PATH_LINE [PATH_LINE ...]]
[--building-line BUILDING_LINE [BUILDING_LINE ...]]
[--building-polygon BUILDING_POLYGON [BUILDING_POLYGON ...]]
[--forest-line FOREST_LINE [FOREST_LINE ...]]
[--forest-polygon FOREST_POLYGON [FOREST_POLYGON ...]]
[--forest-point FOREST_POINT [FOREST_POINT ...]]
[--water-line WATER_LINE [WATER_LINE ...]]
[--water-polygon WATER_POLYGON [WATER_POLYGON ...]]
positional arguments:
elevation
output
optional arguments:
--z-factor Z_FACTOR
--elevation-smoothing ELEVATION_SMOOTHING
add layer arguments:
--block-size BLOCK_SIZE
--crs CRS
--path-line PATH_LINE [PATH_LINE ...]
--building-line BUILDING_LINE [BUILDING_LINE ...]
--building-polygon BUILDING_POLYGON [BUILDING_POLYGON ...]
--forest-line FOREST_LINE [FOREST_LINE ...]
--forest-polygon FOREST_POLYGON [FOREST_POLYGON ...]
--forest-point FOREST_POINT [FOREST_POINT ...]
--water-line WATER_LINE [WATER_LINE ...]
--water-polygon WATER_POLYGON [WATER_POLYGON ...]
add layer optional arguments (line and polython only):
*dilation DILATION
*flattening FLATTENING
*elevation-difference ELEVATION_DIFFERENCE
usage: filename [*dilation DILATION] [*flattening FLATTENING] [*elevation-difference ELEVATION_DIFFERENCE]
SceneFromGIS 2023
All Rights Reserved